Robotics · Automation · Additive Manufacturing
3D printing for robotics helps teams build custom grippers, mounts, tooling, covers and lightweight components without waiting for dedicated tooling.
Robotics projects change quickly. Sensor locations move, grippers evolve, cable routes are revised and a bracket that looked correct in CAD may need another iteration after the first machine test. Additive manufacturing shortens the distance between a design change and a physical test.
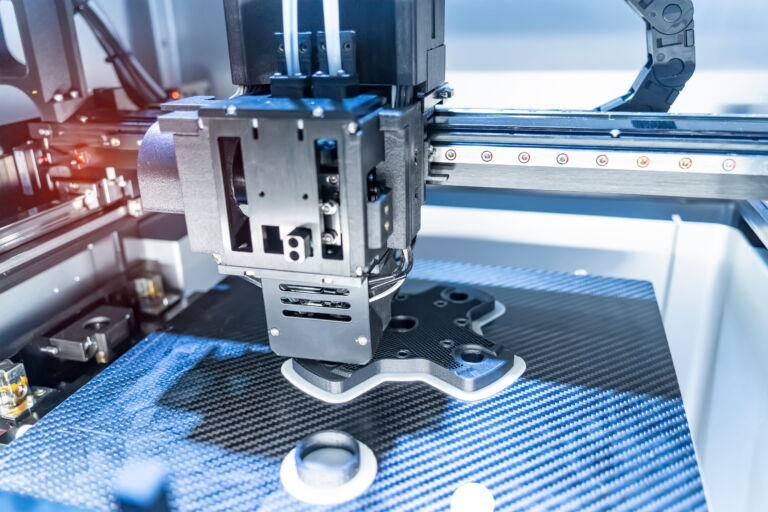
For robotics and automation teams, 3D printing is not limited to prototypes. It can produce end-of-arm tooling, custom gripper fingers, sensor mounts, protective covers, cable-management parts, jigs, fixtures and suitable low-volume functional components.
3DRM Tech supports robotics and automation manufacturing through FDM, SLS and SLA printing alongside CAD, scanning, CNC, composites and repeat production.
Short answer
3D printing is useful in robotics because parts are frequently customized, lightweight and produced in low quantities. It allows teams to test interfaces quickly, consolidate features and manufacture machine-specific components without creating dedicated tooling for every revision.
01Why robotics teams use 3D printing
Robotics equipment combines components from multiple suppliers inside limited space. Custom additive parts can adapt one interface to another while integrating cable paths, sensor protection, labels or operator-friendly features. Digital production also makes revisions easier when the robot, product or workstation changes.
Development value
- Fast physical iterations
- Fit and reach validation
- No dedicated mould for each change
- Easy version-to-version geometry updates
Operational value
- Machine-specific components
- Lightweight custom geometry
- On-demand replacement parts
- Repeat low-volume production
02Robotics parts that can be 3D printed
03End-of-arm tooling and gripper components
EOAT often needs to match a specific workpiece. Printed fingers, contact surfaces, nests and vacuum mounts can be designed around product geometry without machining a new tool for every development revision. Replaceable contact elements can simplify wear management.
The design must account for payload, acceleration, moment loads, repeat cycles, collision risk and any human interaction. A printed prototype can validate geometry, but performance testing determines whether the same process and material should be used in service.
04Lightweighting robotics components
Mass at the end of a robot affects payload and dynamic behaviour differently from mass near the base. Additive manufacturing can remove unnecessary bulk, combine brackets and route services through one component. Lightweighting should preserve stiffness, fastening integrity and safety.
Do not assume less mass always means better performance. Thin flexible parts may reduce positioning consistency. The best design balances mass with stiffness, load path, reach and serviceability.
05Choosing FDM, SLS or SLA
| Process | Robotics fit | Considerations |
|---|---|---|
| FDM | Brackets, housings, fixtures and iterative prototypes | Material, orientation, supports and layer-direction strength |
| SLS | Durable nylon, complex geometry, snap fits and consolidated parts | Powder removal, finish and application-specific properties |
| SLA | Fine-detail components, visual checks and master patterns | Resin behaviour under load, heat and repeated use |
See the complete FDM, SLA and SLS comparison.
06Material and design requirements
Define static and dynamic load, temperature, impact, chemicals, UV, moisture, electrical considerations and expected cycles. Provide clearance for cables and tools, access to fasteners, strain relief, maintenance space and safe edges. Inserts or machined hardware may be useful at loaded or frequently serviced interfaces.
07From custom idea to validated robot part
Define the interface
Identify the robot, hardware, mounting pattern, available envelope and task.
Capture geometry
Use CAD, dimensions, hardware data or 3D scanning.
Design the component
Include loads, fasteners, wiring, access and clearances.
Prototype and test
Test fit, reach, interference and handling on the actual system.
Revise the design
Improve geometry, stiffness, weight or access from feedback.
Select the production route
Choose printing, CNC, composites or a hybrid.
Control repeat production
Retain the validated file, material and revision.
CAD design and 3D scanning can establish geometry when an accurate model of the existing machine is unavailable.
08When CNC or composites may be better
CNC machining may suit precision bearing interfaces, shafts, structural metal adapters, high-temperature parts and severe wear. Carbon fibre and composites may suit specialized lightweight structures where stiffness-to-weight drives the project. Many robot systems combine printed covers and tooling with machined or composite structures.
09Replacement parts and repeat production
Automation cells may use custom parts that never reach mass-production quantities. Once validated, digital files can support spare mounts, changeover parts, guides and guards without carrying large inventories. Revision control is essential so field replacements match the correct machine configuration.
Learn about low-volume production for repeat functional components.
10What to send for a robotics project quote
Send robot or equipment model, CAD and hardware data, photos, envelope dimensions, mounting interfaces, payload, expected cycles, operating environment, quantity and the problem being solved. 3DRM Tech can review design, prototype and production options.
Developing a robot or automation cell?
Share the interface, hardware and functional requirement for a process recommendation.
Discuss your robotics part →11Frequently asked questions
// common questions, answered
What robotics parts can be 3D printed?
Common applications include gripper fingers, sensor mounts, covers, cable guides, fixtures, spacers and custom low-volume components.
Is 3D printing only useful for prototypes?
No. Suitable materials and validated designs can also support functional and repeat low-volume parts.
Can a gripper be 3D printed?
Gripper fingers, nests and prototype end effectors are common candidates when loads and environment fit the process.
Which process is best for robotics?
FDM, SLS and SLA serve different needs. Select according to geometry, strength, detail, finish, quantity and environment.
Can you design around an existing robot?
Yes. Projects can begin from CAD, dimensions, hardware specifications, photos, scans or physical references.
How does printing reduce EOAT weight?
It can consolidate features and remove unnecessary material, but stiffness and load paths must remain suitable.
When should a robotics part be machined?
Use CNC when metal, tight interfaces, wear, heat or structural requirements lead the design.
Can printed parts use metal inserts?
Yes. Inserts and standard hardware can reinforce threads and serviced interfaces when designed appropriately.
Can parts be reordered later?
Validated digital files can support future batches when the material, process and revision are controlled.
What should I send for a quote?
Send CAD, equipment details, interfaces, payload, environment, quantity, photos and the required function.